Sunday, February 3, 2013

Beat the Bookcase Blues...

Bookcases are a great way to show off your favorite pieces of literature and accessories, but let's be honest they are a little boring. In this post I'm going to share some easy and cheap ways to make your bookcase a statement. Along with step-by-step instructions on how I did it this week.

In past posts we've talked about pattern and accent walls. You can treat the back of your bookcase the same way! This is especially great for those not quite ready to attack a whole wall. You can use the tips I shared about mixing patterns and creating accent walls to make your bookcase a statement and not just a holding place.

This week I've been working diligently on getting our master bedroom put together. I set a timeline to be done by the end of February, but I wanted to get the bones done so I can spend the rest of the month tweaking it and making it just right. We purchased a bookcase and it was so boring. I had to do something to add some interest to it. I decided to wrap the backing of the shelf with fabric to add some visual interest. Off to JoAnn's I went and I found a blue print that I really liked. I rushed home and got to work.


I started by laying out my fabric and the backing board from the shelf on top. I cut around the board leaving about 1.5-2" around the edge to wrap around. 


Once you have cut out the fabric, it is important to make sure your pattern is straight. After I cut out my fabric I realized that perhaps the front of the fabric was too dark and bold. At the last minute I decided to use the reverse (back) side of the fabric because I liked how the print was much lighter.


Next, I used my hot glue gun and put some beads of glue on the board and folded over the fabric. I've done this before and if you ever want to change the fabric you can simply use a razor blade scraper and it comes right off. While attaching your fabric it is important to do opposite sides first. So, if you do the top first, then do the bottom next. Make sure to pull it tight and keep your print straight.


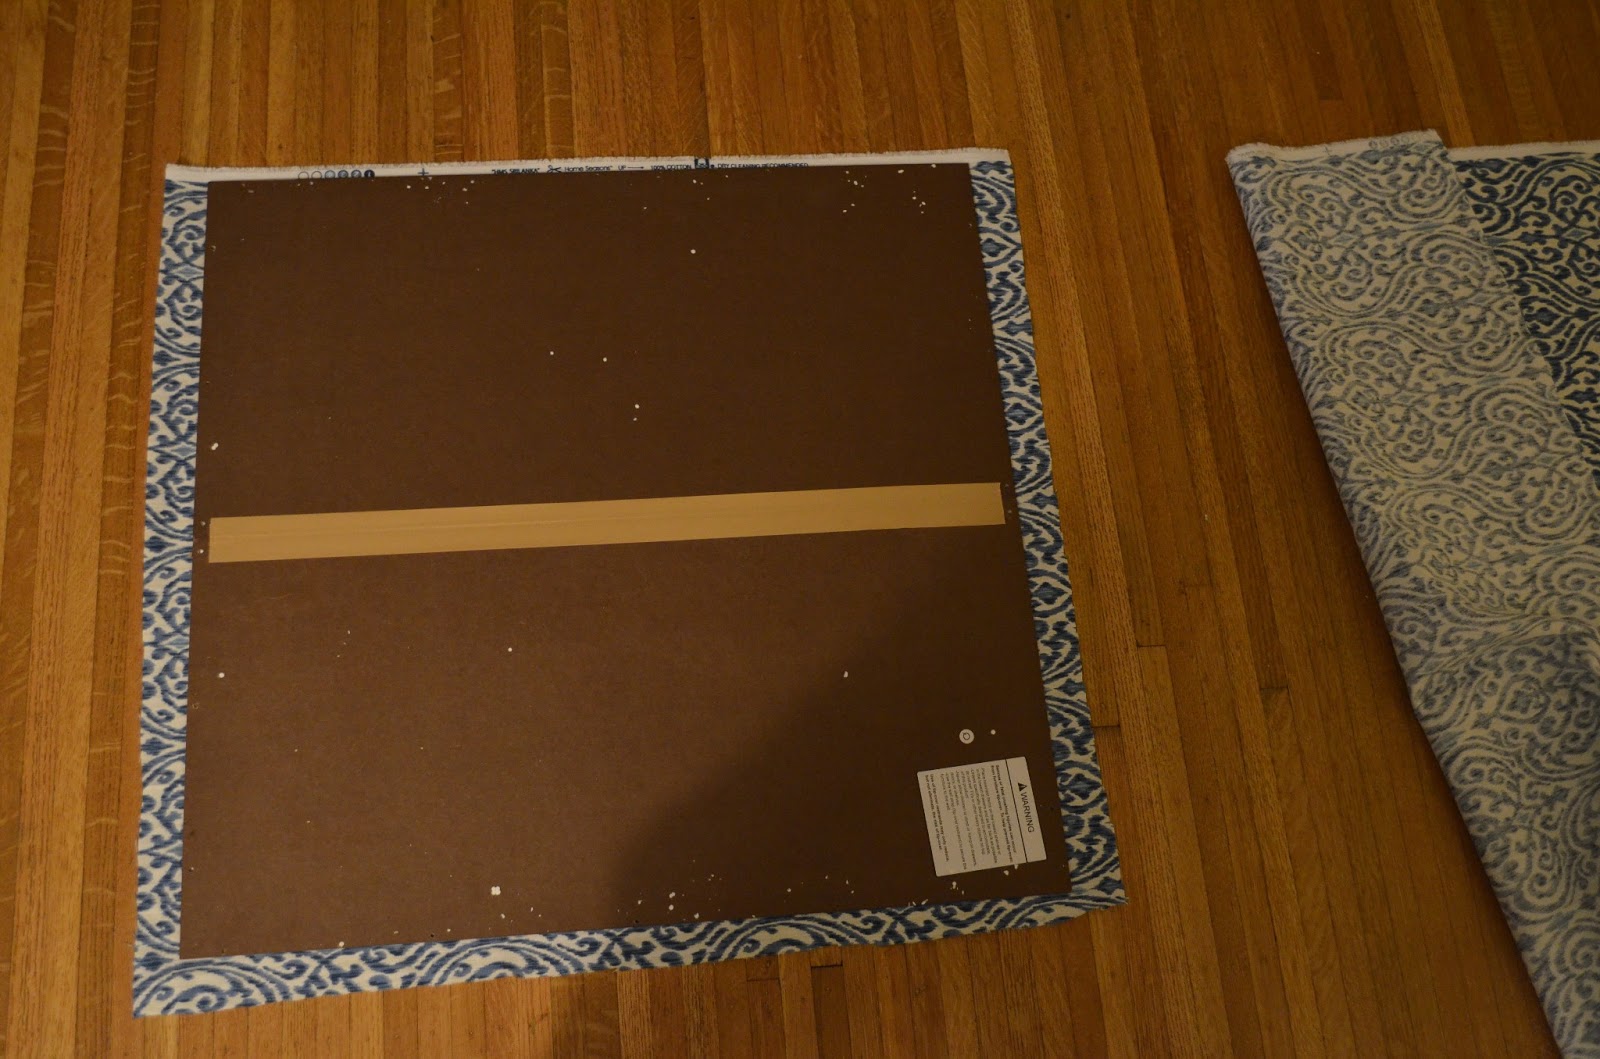
Done! All that is left is to attach it to the back of the bookcase.


There are other options if you don't want to go the fabric route. Here are some other options to spice up your bookcase. 


In my living room I simply painted the back of the shelf with a light blue paint to add a subtle 
contrast. 


You can also opt to paint the back a much bolder color. I especially love the contrast of the dark charcoal bookcase with the white pitchers. I'm kind of obsessed with it and I'm already thinking about where I can do this in my home. 


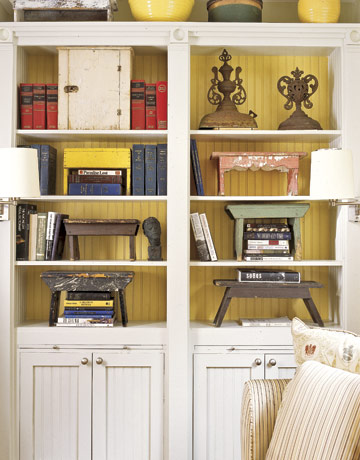
I love how this home owner used the beadboard to add texture and then painted it a bold color. If you are little concerned about a bold color, paint the beadboard to match the bookcase to add great texture.


This home owner decided to stencil the back of the bookcase. I think this is a great way to add pattern, and if you get tired of it just paint over it. 


Lastly, I'm totally in love with this graphic trellis wallpaper. For many it may be too much, but I think for the eclectic feel of this space, it is absolutely perfect!

Now, it is your turn. Use your bookcase to add interest and intrigue to your space. You can't go wrong. 


Sunday, January 27, 2013

Where does the time go?


It seems like there is never enough time. In the search for balance and time management strategies I began looking for time books. The criterion for the book was that it wasn't too long, because I don't have enough time to invest in a lengthy book (I'm in the midst of reading various texts for work). While searching, Friday night, I stumbled upon this...


I read it all that evening. In it were great suggestions that were backed with research about what the most successful people do before breakfast. I frantically highlighted portions and took notes while reading it. My biggest takeaway would be this:

"Small rituals can accomplish great things. A habit, Anthony Trollops once said, "has the force of the water drop that hollows the stone. A small daily task, if it be really daily, will beat the labors of a spasmodic Hercules." When you make over your mornings, you can make over your life. That is what the most successful people know."

Eating In...


People often ask me what I do to maintain my current weight. I shared some of my daily tips in my first weight loss post, but have saved one of the best for now. I know the biggest key to my weight loss and maintenance is eating in.

By preparing my own food I control portions, ingredients, freshness, fats, oils, and spices. When we eat out we have no clue what has gone into our food, but by cooking at home we know exactly what was used, the amount, and how many calories the dish contains. 

Steven and I are huge advocates of eating at home. We go out once a month, sometimes even less, and our weight remains fairly consistent. There are more benefits than just being able to fit into my jeans. It allows us to spend more time at home relaxing after a tough day (we both have hectic jobs). We enjoy going out, because it becomes more of a treat than a norm. Lastly, we save so much money, that we can put it towards things we really love, like our home and traveling. 

I'm the cook in our house, and I wouldn't want it any other way. There is something really nice about coming home from work, putting on my comfy clothes, and cooking a meal for us. It is a stress reliever after a long day and makes me feel good. I've also become a better cook and more adventurous leading me to create some of my own low calorie dinners. 

Here is a meal I came up with based on what I had in my pantry and fridge. It has become one of our favorites. 
What you need:  good olive oil
                         1 box of whole wheat penne pasta
                         3-4 cloves of garlic (minced)
                         2 pints of cherry tomatoes halved
                         1 can of cannellini 
beans
                         salt and pepper
                         crushed red pepper
                         fresh grated parmesan cheese


Heat 2-3 tablespoons of EVOO in the bottom of a heavy pot, and add garlic. When the garlic is golden add a pinch of crushed red pepper.


Add the tomatoes and cook until they break down, stirring often. While the tomatoes are cooking boil water and cook pasta. Pull the pasta before it is done (it will finish cooking in the pot). 


When tomatoes have cooked down (about 10-15 minutes) add beans.


Add the pasta and allow to finish cooking with the tomatoes and beans, stirring frequently. Add salt and pepper to taste.

And that's it! Serve with some fresh Parmesan cheese and enjoy!

Remember -- make your home your new restaurant and eat in.

Matching the Mismatched...

There is a movement in home decor. The days of buying matching bedroom sets, living room sets is over. Now, the eye for putting pieces together as though you've collected them over time is in. For some of us, this is the case. We've accumulated hand-me-downs since college and now in our house we have a mismatched collection of furniture. Do not fret, it is easy to make it work. 

Let's focus on nightstands. If you are like me, you have a collection of small tables floating around your house and hidden in storage. It is time to pull them out and make them work. There are many reasons why this is a great strategy:


1. It is a budget saver. It is typically must cheaper to pick up different tables at thrift stores or discount stores for a decent price.
2. Space availability on each side of the bed isn't always the same. By using two different tables you can choose tables that work.
3. You and your spouse share completely different design aesthetics (that's my situation). 
4. You may have a piece that you really love that, but there was only one of them (or you could only bring yourself to buy one due to the price). 
5. It adds character!

Here are some strategies to make this concept work in your space. Pick your favorite and give it a try. Remember, opposites attract.


Lastly, the easiest and cheapest way to make two pieces work together is to paint them the same color. It is easy, cheap, and works every time.

Happy decorating!

Monday, January 21, 2013

Just the beginning...

Well, it is day one of project "Master Bedroom Makeover." I think for the first day I got a lot accomplished. I started by getting the room painted. Yes, day one and the room is painted! I'm pretty happy with the color. With the flash of the camera and the light from the lamp the color looks a little off from the inspiration, but it does have that muddy gray tint to it, in person. 
 Tonight I started creating a mood board. It is just the beginning, but I'm beginning to envision the final product and I can't wait!
Please ignore the subject-verb agreement error. Here are, not here is. :)
Make sure to check back frequently for progress reports.

Sunday, January 20, 2013

The Winner Is...

I posted these four master bedroom pictures on my Facebook page and left it up to my friends to vote on what would be my inspiration for my master bedroom redo.
After 56 votes the results are in. The winner and the inspiration for my new project is...
Check back here frequently for the progress of the project. I'm looking to have it completed by the end of February. Here is the current status of our master bedroom. 

Well, I better start planning!

Head-boring...


Headboards…I mean head-boring. What is a headboard’s purpose? It is there to fill that dead space behind your bed. Most people do not view it as a chance to add some real interest and charm to their space.

We all have that boring wooden headboard that matches the bedroom set we purchased when we bought our home (talk about a real sleeper). The purpose of this post is to show you some fun alternatives, to get you away from the norm.

This may encourage you to begin looking at objects in a different way. So keep your eyes peeled during your next flea market trip. Happy hunting.